|
|
|
Building the WabaVM for Windows NT/98/2000:
This is a how-to for software developers that want to build the Waba Virtual
Machine from source code.
-
To start out, you need a C compiler that can compile Windows programs. You
can use any compiler that can compile Win32 programs but in this article,
we only discuss how to build it using Microsoft Visual C++. The process with
any other compiler should be very similar.
-
Using Visual C++, you start out by creating a project for the WabaVM.
You can use the "New..." button in the File menu and then
choose Project in the "New" Dialog to create a new project.
The project window looks like this:
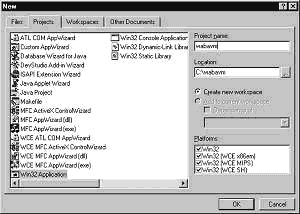
You should choose "Win32 Application" for the type of project:

-
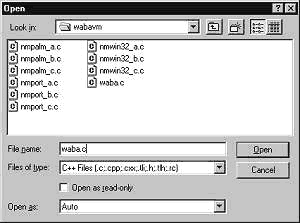
Now that you have your project set up, you should add the waba.c
file to the project. You should only add the waba.c file and none of
the other .c files that are part of the WabaVM source to the project:
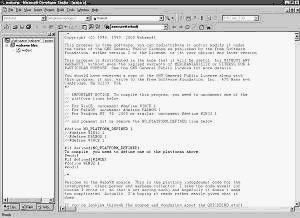
After adding the waba.c file to the project, the window should look
like something like this:
-
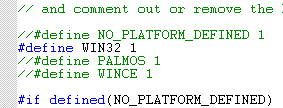
Now you should edit the waba.c source and comment out the #define for
NO_PLATFORM_DEFINED and uncomment the #define for WIN32.
After editing, the code should look like this:
-
Now you need to add the libraries that the WabaVM needs to link. The
WabaVM requires the ws2_32.lib, winmm.lib and mpr.lib libraries.
To add the library, you should choose the Project menu and then
"Settings.." to get the Project Settings Dialog:
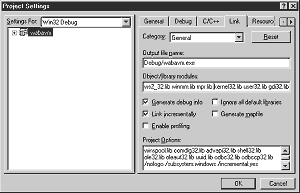
Then click on the Link tab and add the ws2_32.lib, winmm.lib and mpr.lib
libraries to the "Object/library modules" edit field.

-
That's it, you're ready to build the WabaVM. You can either click
on the build button or choose "Rebuild All" in the Build menu.
The result of the build is a waba.exe. It and a waba.wrp, containing
the waba foundation classes, together make up the Win32 version of the
WabaVM which can run under Windows NT, 98 or 2000.
Copyright (c) 1999 - 2001 Wabasoft. Waba, WabaVM and WabaSDK are trademarks of
Wabasoft Inc.
|
|


